


This post is also available in:  Suomi
Suomi Dansk
Dansk Deutsch
 Italiano
 polski
 Русский
 Svenska
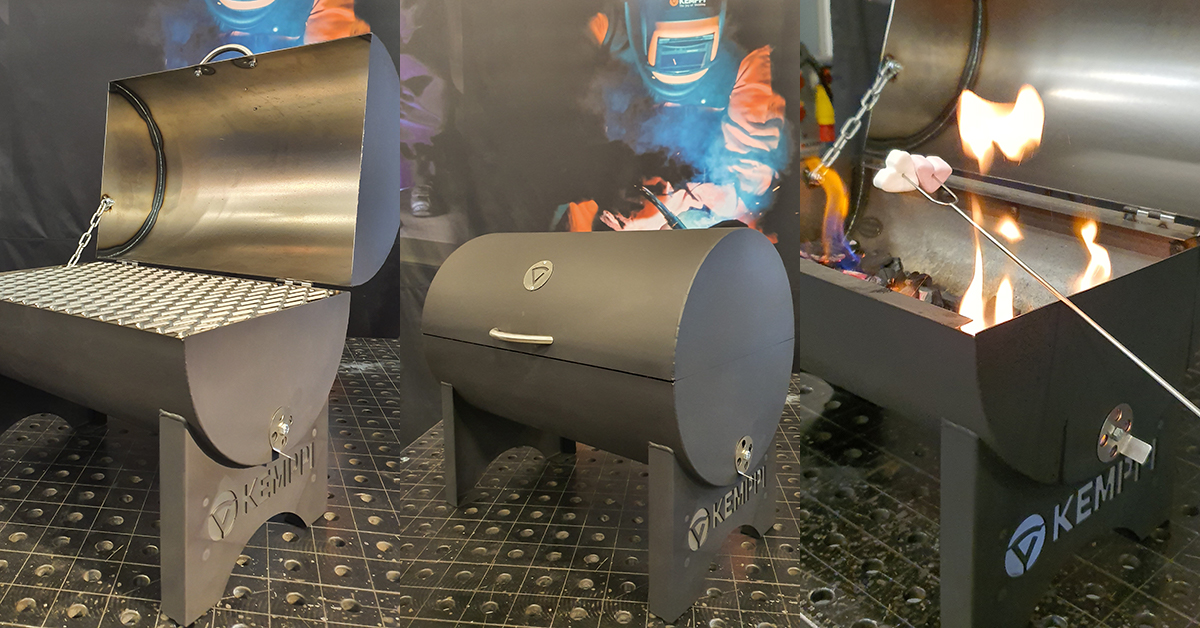
Here in Finland summer is just around the corner, and a hot barbecue season awaits! There is still time for the most enthusiastic D.I.Y. hobbyists to get to work on building a barbecue of their own, and Kemppi’s Welding Services team has designed a stylish charcoal barbecue for you to construct. Download the instructions complete with pictures and design drawings and you are one step closer to firing up your barbecue.
You will need the components in the picture below to make the charcoal barbecue designed by Kemppi’s Welding Instructor Olli Keskinen. The material is 1.25 mm S355 steel. For a more durable grill, you can use stainless steel.
A Kemppi MasterTig 335ACDC TIG welding machine was used to weld the barbecue.
Download printable instructions and drawings of the components
Components of the barbecue
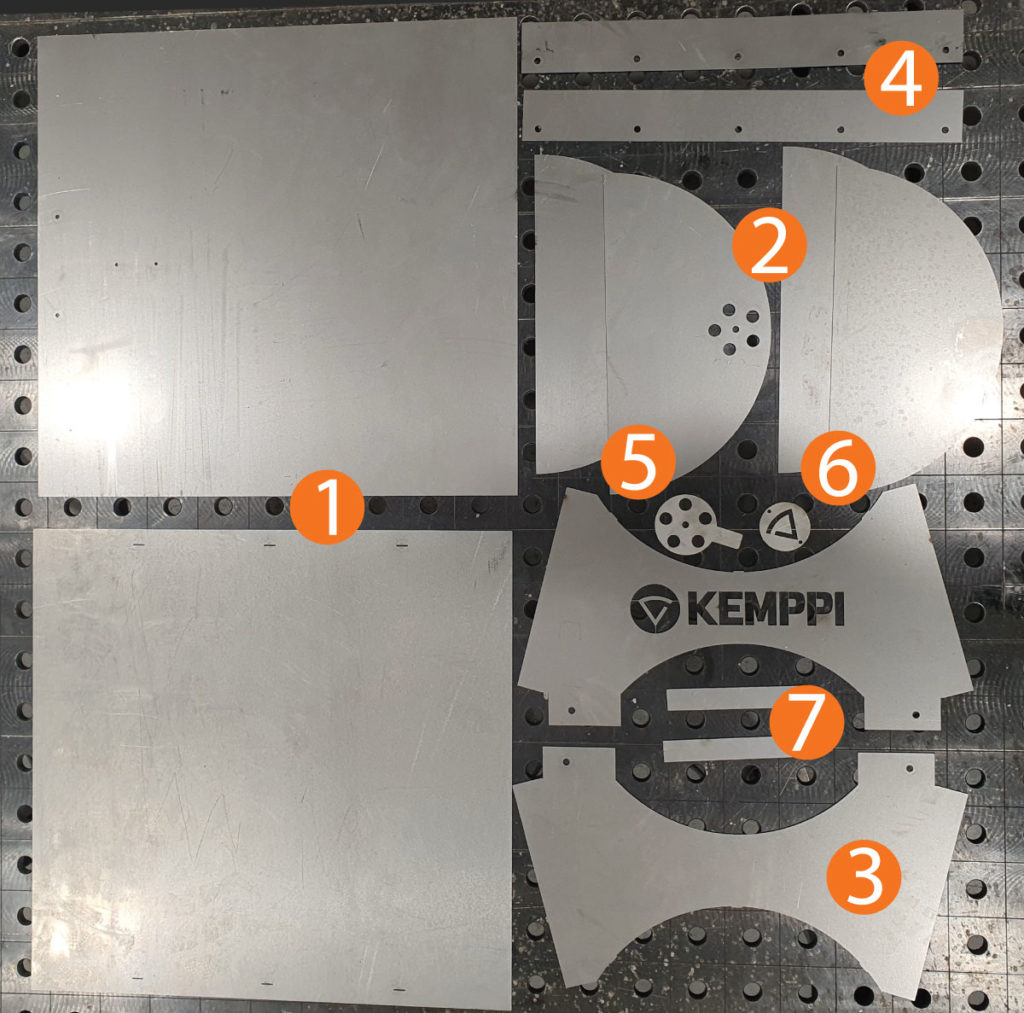
- 2 x casings, top and bottom (no. 1)
- 4 x side plates (no. 2)
- 2 x feet (no. 3)
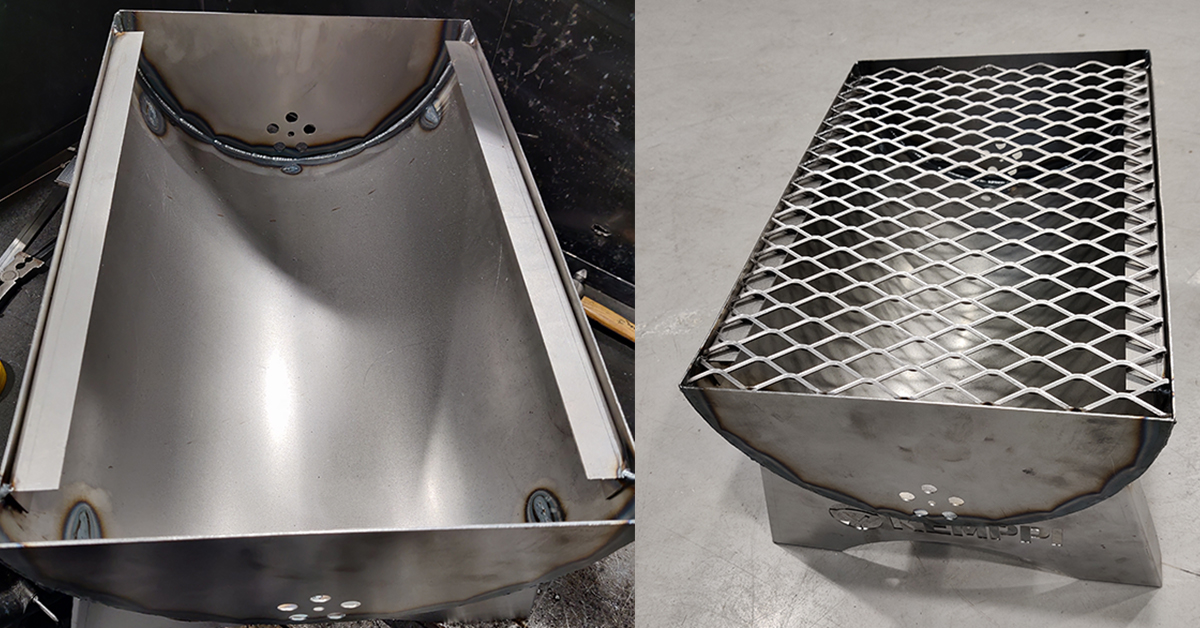
- 2 x grille supports (no. 4)
- air intake controller (no. 5)
- Kemppi logo (no. 6)
- 2 x side handles (no. 7)
You will also need:
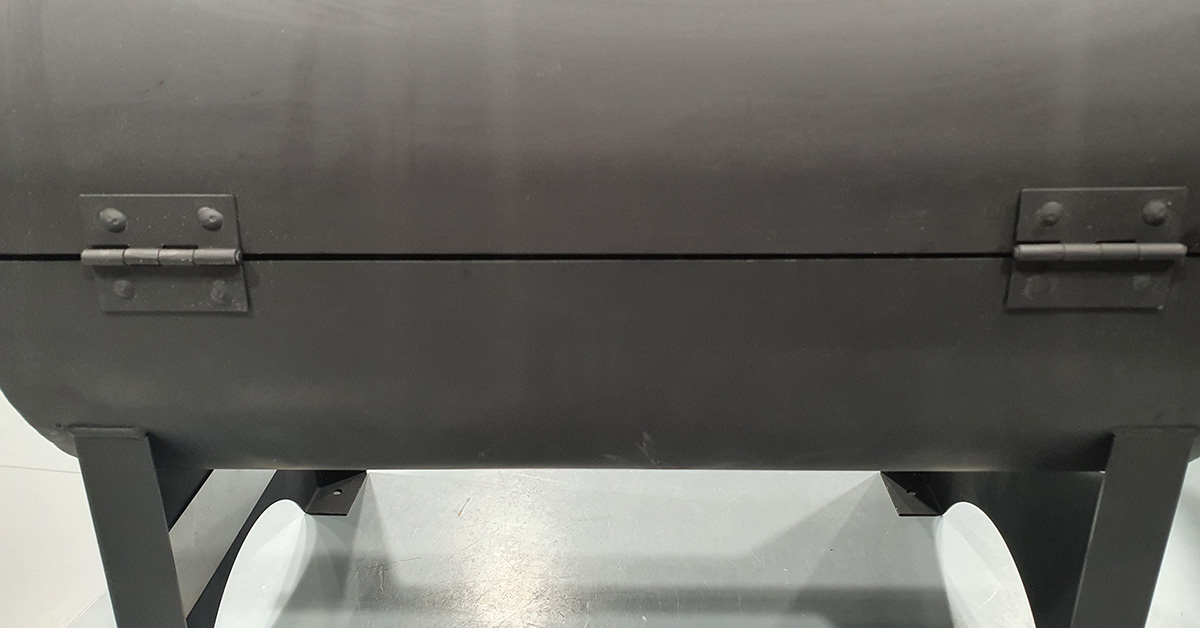
- 2 x hinges
- cover handle
- 2 x nuts and screws (for fixing the air intake controller and the chain)
- approx. 17 cm of metal chain
- 43 x 29 cm grille
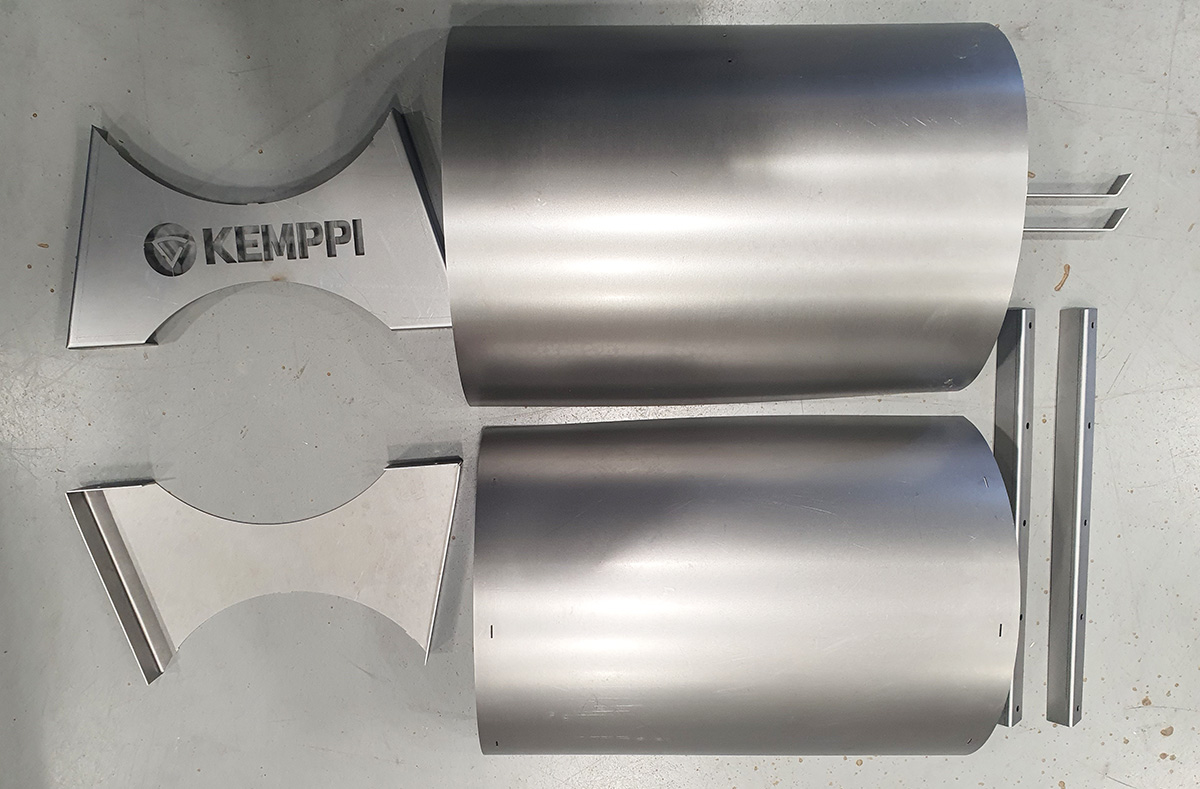
1. Preparations
Before commencing the welding, a cleaning agent should be used to clean any grease off the components.
The next step is to bend the barbecue’s legs, handles, and grille supports. The top and bottom casings are rounded according to the end piece by mangling the plates. The exact dimensions and bend angles are in the file attached to the component drawings.
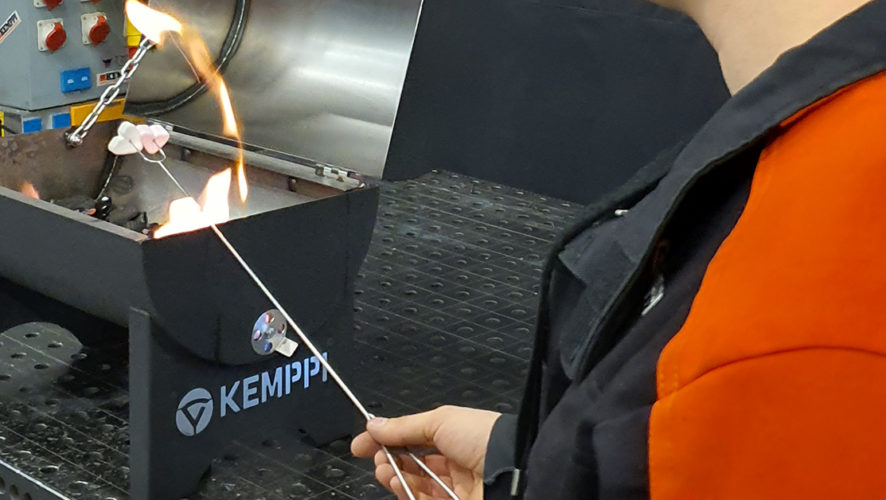
2. Tacking
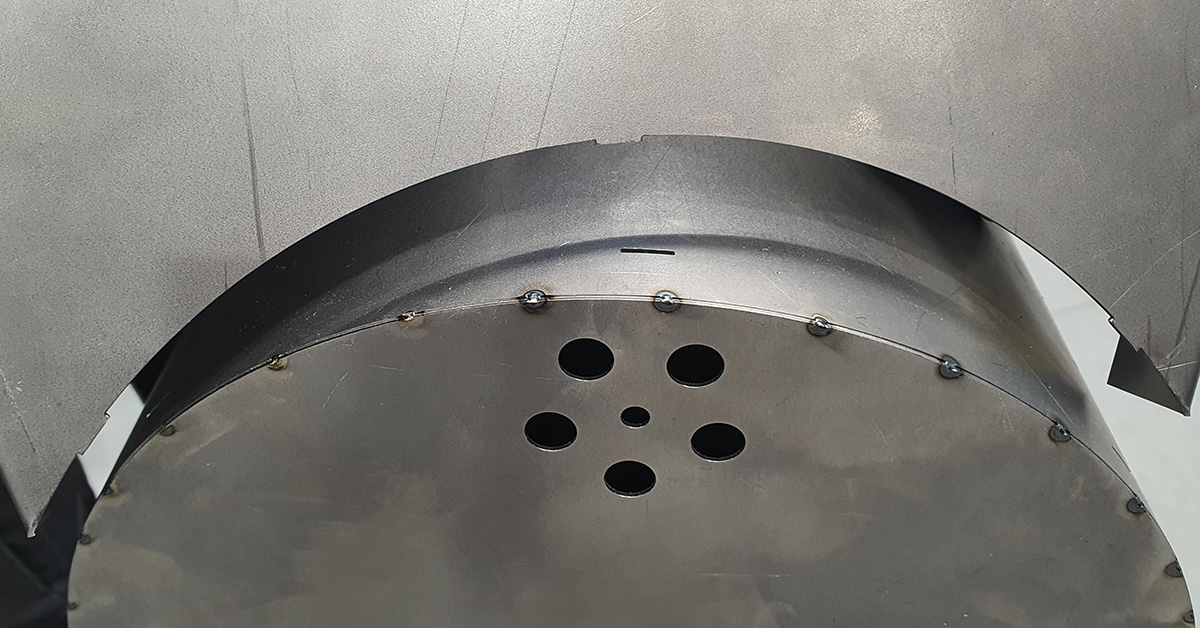
The barbecue is tack welded together without any filler material using the TIG process. Make sure that the alignment stubs are pressed into their holes properly. These stubs should be melted from inside the grill during tacking.
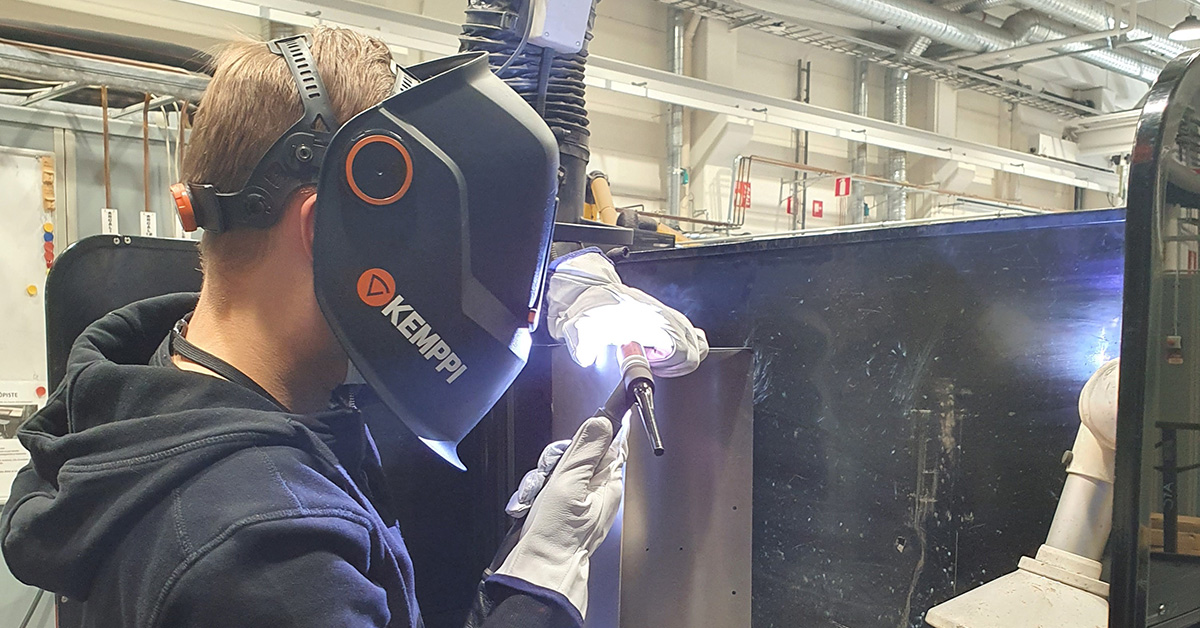
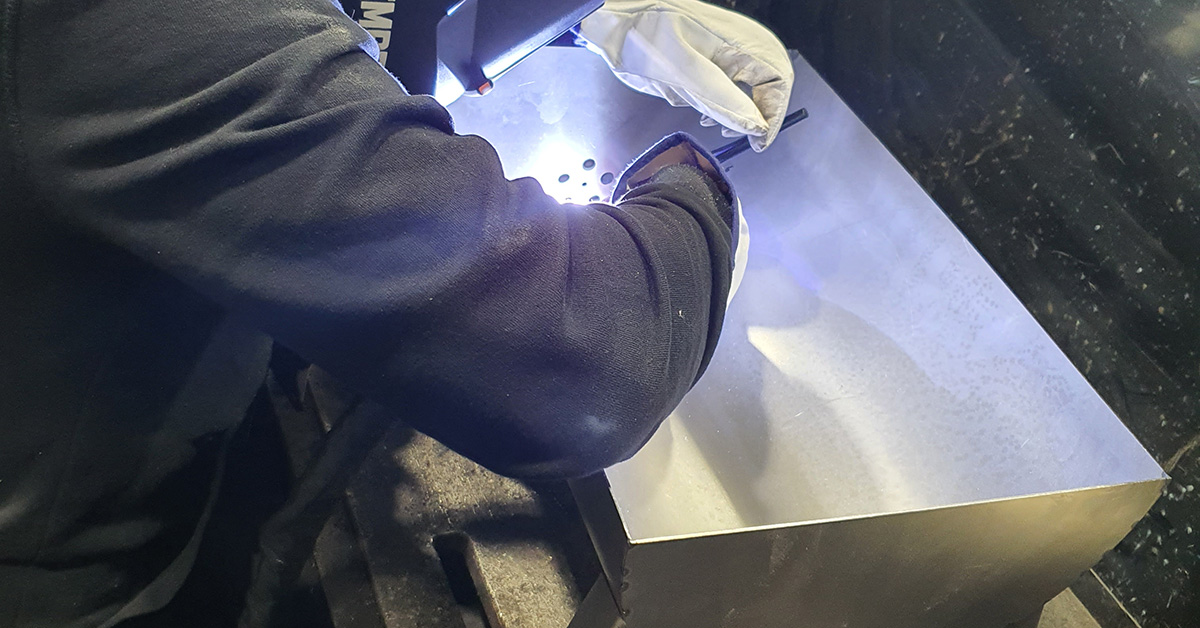
3. Welding
After tacking, the ends of the casings are TIG welded without filler material. The other joints are designed to be MAG welded, but they can also be TIG welded with filler material. Check that the mounting plates on the legs of the barbecue fit into the holes provided for them.
After welding the base and cover of the barbecue, the grille supports are attached to the inside of the barbecue by plug welds.
4. Finishing
The cover and base of the barbecue are connected by hinges that are welded on. The barbecue is then painted with heat-resistant, matt black spray paint. Follow the instructions on the paint can.
Once the paint is dry, a short metal chain is attached to the barbecue to hold the cover up. The Kemppi logo is riveted, the handle is screwed to the lid, and the air intake hatch is screwed to the base. If you wish, you can weld a thin stainless steel plate behind the Kemppi logo on the leg of the barbecue.
Now all you need to do is fire it up!
Discover the MasterTig product range
Thanks for the information on the barbecue
very great Idea 😕